Running Multiple Containers With Docker Compose

Docker Compose is a tool that is used for defining and running multi-container applications on a single Docker host. Compose allows you to manage the whole application lifecycle, which includes starting, stopping, and rebuilding containers.
In most cases, applications don't consist of one monolithic block, but of several application services that work together. When using Docker containers, each application service runs in its own container. When we want to run such a multi-service application, we can, of course achieve that by using a series of Docker commands, however, this is inefficient at best.
With Compose, the emphasis shifts to describing what you want instead of how to create it. In other words, taking a declarative, as opposed to an imperative approach.
Compose lets you write a YAML file that defines multiple types of images and how they communicate together, and then spin up the entire application in just a single command.
Pre-Requisites
It is assumed that you have at least beginner knowledge of Docker. A guide that introduces Docker can be found here.
You also need to have Docker Compose installed on your system. This is automatically done if you are on Windows and have installed Docker for Desktop. For mac users, Compose comes installed with the Docker for Mac application and Docker Toolbox for older systems. Otherwise, you'll need to install Compose separately, and you can find detailed installation instructions here: https://docs.docker.com/compose/install/
Structure of a Docker-Compose File
Docker Compose consists of two parts: a specially formatted configuration file called a Compose file, and a command-line interface. Compose files are where you declare the services you want, and the Docker Compose command-line interface is how you manage the multi-container application declared in a Compose file.
The Compose file lets you manage all the application containers as a single unit. It uses files formatted in YAML as input. By default, Docker Compose expects these files to be called docker-compose.yaml or docker-compose.yml, but other names are possible.
You can have multiple configuration files, and you can tell Docker Compose which configuration files to use via the -f flag. A typical use case for having multiple compose files is when you want to target multiple environments, like development, production, staging, or Continuous Integration. Compose has integrations with many Continuous Integrations tools such as Jenkins.
The latest Compose file format is defined by the Docker Compose Specification.
Below is a template showing the top-level elements of a Compose file. We start by specifying the version of the Compose file format, at least one service, and optionally volumes used by the services and networks to be created. Other top-level Docker resources that can be specified include configs and secrets.
version: '3.3'
 services:
 ...
 networks:
 ...
 volumes:
 ...
Let's take a closer look at each section of the Docker Compose file.
Version
Docker Compose supports different versions of the docker-compose.yml format. Newer versions have higher version numbers and add additional Docker Compose features.
When specifying the version of Compose to use, you should include both the major and minor numbers. If you don't do this, 0 is used by default and not the latest minor version. So version "3" is equivalent to version "3.0".
The Docker Compose specification mentions that the version property is now deprecated and is only being defined in the spec for backwards compatibility.
Services
In the services section, we describe each of the containers that are to be built and run.
Docker Compose uses the idea of services instead of actual containers. Services are an abstraction over containers.
For example, let's say we have a dockerized web application that has a frontend, a backend, and a database. We would split those components into three images and define them as three different services in the configuration:
services:
  frontend:
    image: react-app
    ...
  backend:
    image: node-app
    ...
  db:
    image: mongo
    ...
Volumes
The volumes used by any of the services have to be declared in this section. The volumes key is used in a way that is similar to how you would use docker volume create.
You can declare external volumes that have been created outside of the context of the Compose file. For example, a volume created by docker volume create, or a different Compose file.
Networks
Network configuration in Compose files aligns closely with the docker network create command.
Docker Compose can create networks at runtime, or you can use an external network that already exists on the host.
By default, Compose will automatically create a new network using the default bridge driver for an application in a Compose file. The name of the network is based on the name of the directory the Compose file is in, with default appended on the end. All containers created for services in the Compose file join the default network and can be reached and discovered by the corresponding service name.
Docker Compose CLI
The other part of Compose is a command-line interface which it uses to interact with the Docker Engine. Compose will use the Docker Daemon running on the host by default.
Every Docker Compose command starts with docker compose (or docker-compose), followed by a command, and arguments for the command at the end. You can also use docker compose --help to provide additional information about arguments.
For a full list of Docker Compose commands visit https://docs.docker.com/compose/reference/
Getting Started with Docker Compose
We will look at how to get a simple service with multiple containers up and running using Docker Compose.
Create a new folder and navigate into it using the cd command:
mkdir docker-compose
cd docker-compose
Inside the above folder, create another folder with the name init and navigate into it:
mkdir init
cd init
Inside the init folder, create a bash script file with the following content and save it as prepare.sh:
#!/usr/bin/env sh
rm /data/index.html
echo "<h1>Hello from Docker Compose!</h1>" >> /data/index.html
echo "<img src='https://www.docker.com/wp-content/uploads/2022/04/octopus-compose-980x980.jpg.webp' />" >> /data/index.html
This script generates a simple HTML page with the echo commands.
Create a Dockerfile with the following content:
FROM busybox
ADD prepare.sh /usr/bin/prepare.sh
RUN chmod +x /usr/bin/prepare.sh
ENTRYPOINT ["sh", "/usr/bin/prepare.sh"]
This Dockerfile is based on busybox, which is a very small operating system for space-efficient containers, and it adds the prepare.sh script into the filesystem and makes the file executable. The prepare.sh script is initialized with the start of the Docker container.
Change the directory to the parent folder with the cd .. command and create a docker-compose.yml file with the following content:
version: "3"
services:
 init:
 build:
 context: ./init
 volumes:
 - static:/data

 server:
 image: nginx
 volumes:
 - static:/usr/share/nginx/html
 ports:
 - "8080:80"
volumes:
 static:
This Compose file creates one volume named static, and two services with the names init and server. The volume is mounted to both containers.
To use our docker-compose.yml script to bring up all the containers, we use the docker compose up command. If you've named the file something else, this is where you would use the -f switch I mentioned earlier to tell Compose which .yml file to use.
By default, Compose runs all the containers in the configuration file in debug mode. Use the -d switched to run the containers in detach mode which will allow you to continue using the terminal:
docker compose up -d
The following image shows what happens when the preceding command is executed:
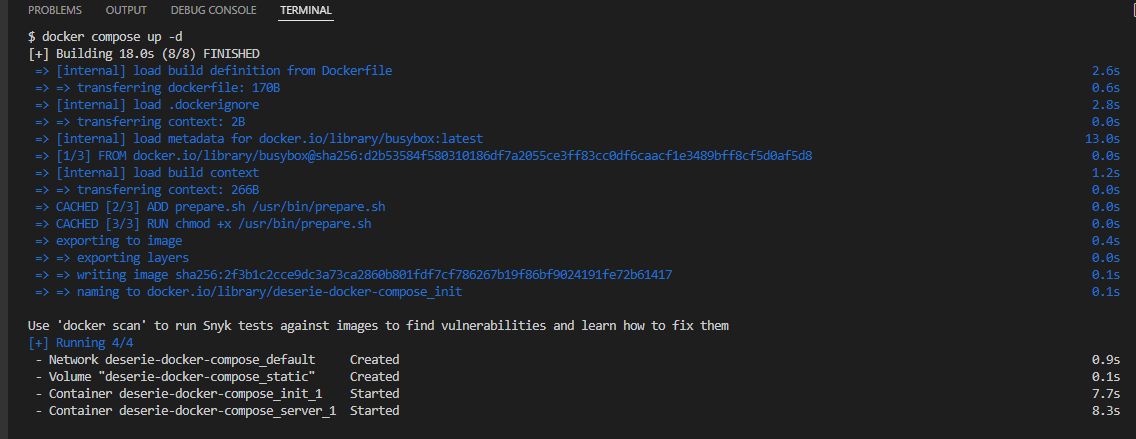 Figure 1: Starting the application
The up command performs all the actions required to start up the application described in the Compose file. It starts by creating a network and any named volumes. It then takes the actions required to bring up service containers. This includes building images if required, then creating and starting containers.
When you run the compose up command, you get the desired state of your application, but that’s where Docker Compose ends. It's not a full container platform like Docker Swarm or Kubernetes.
To check the status of the application run:
docker compose ps
 Figure 2: Application status showing two containers (init container and Nginx container)
Open http://localhost:8080 in the browser. The following figure shows the output:
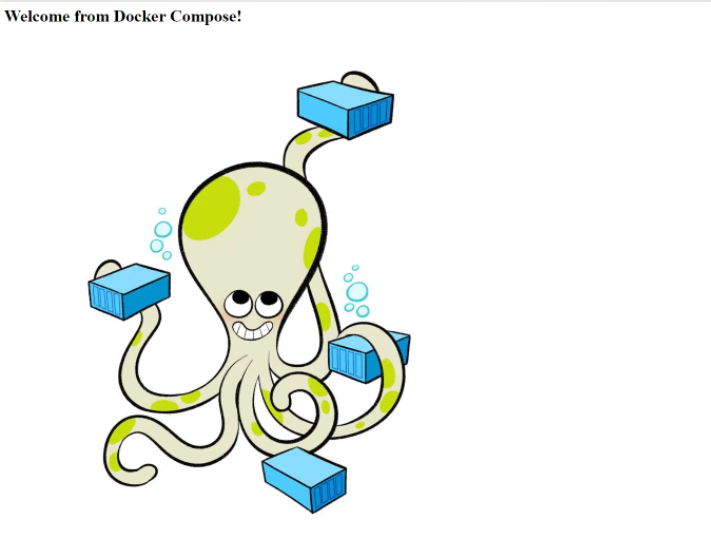 Figure 3: Server output
The browser shows the index.html page created by the init container, showing that Docker Compose created the volume, mounted it to the containers, and started them successfully.
To stop and remove all the resources use the following command:
docker compose down
The command will return output like the following:
 Figure 4: Stopping the application
Conclusion
This post introduced Docker Compose as a way to simplify working with images and containers, while also increasing your efficiency and productivity as a developer.
We created a Docker Compose file that specifies the microservices in our application, and learned how to use the Docker Compose command-line interface to turn our multi-container application described in the Compose file into an actual running environment in Docker.
Hopefully this overview has helped you better understand the Docker Compose landscape.


